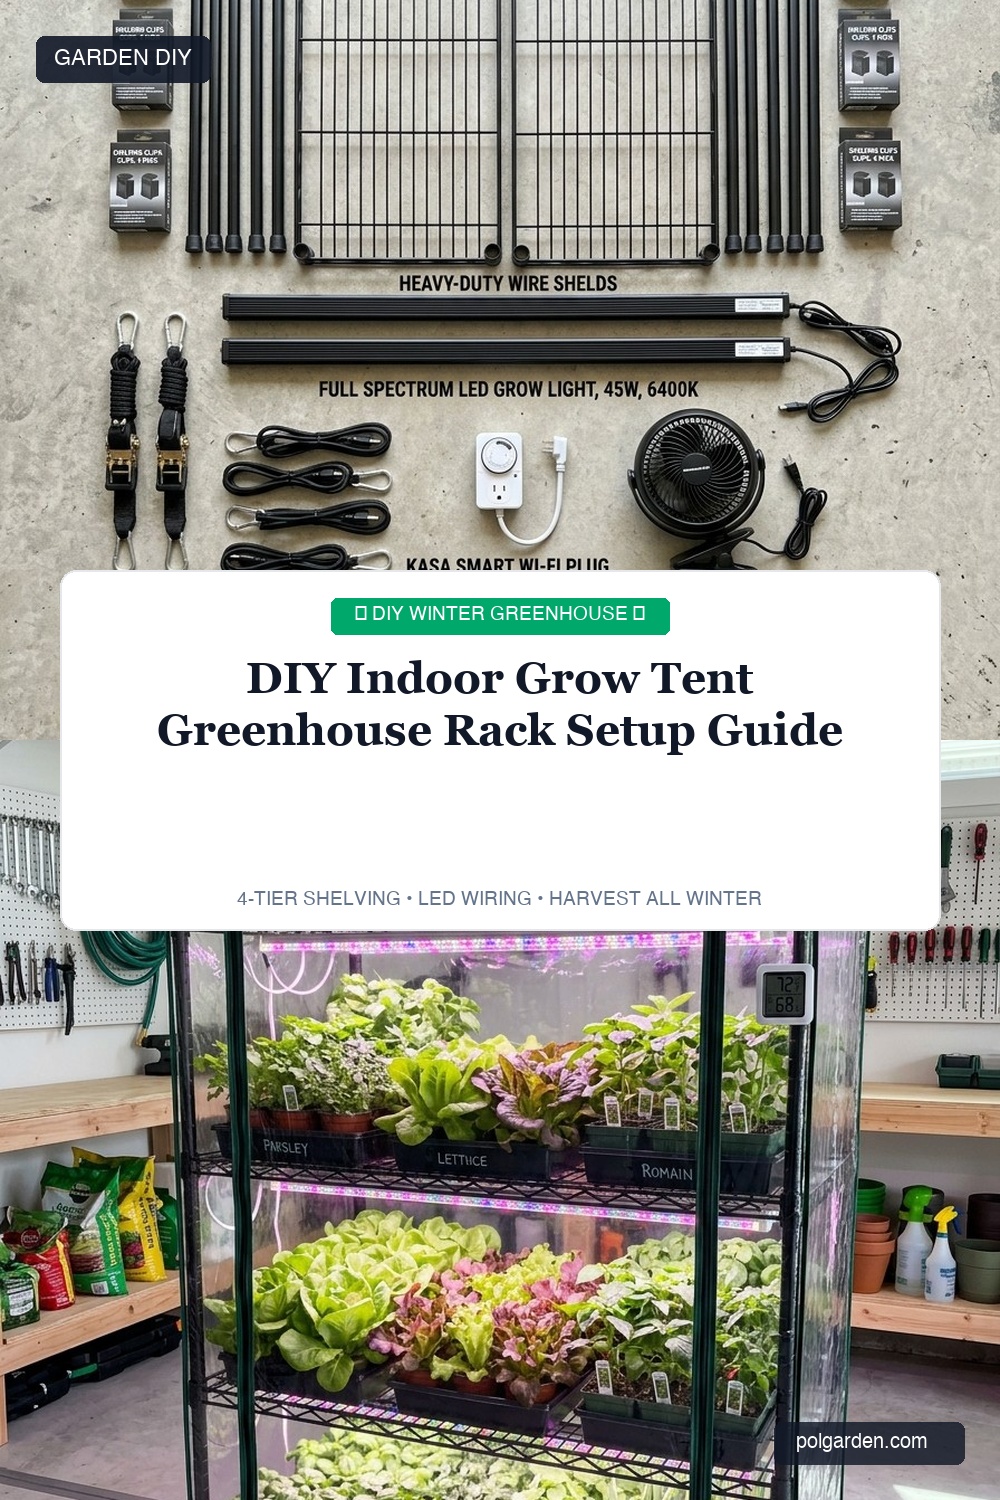
When freezing winter weather shuts down your outdoor garden beds, you don’t need an expensive heated greenhouse or commercial warehouse space to continue harvesting fresh culinary herbs, crisp salad greens, and microgreens. By transforming an ordinary 4-tier steel wire shelving unit into a high-efficiency DIY indoor grow tent greenhouse rack, you can produce abundant year-round edible crops in less than four square feet of floor space for a fraction of commercial hydroponic system costs.
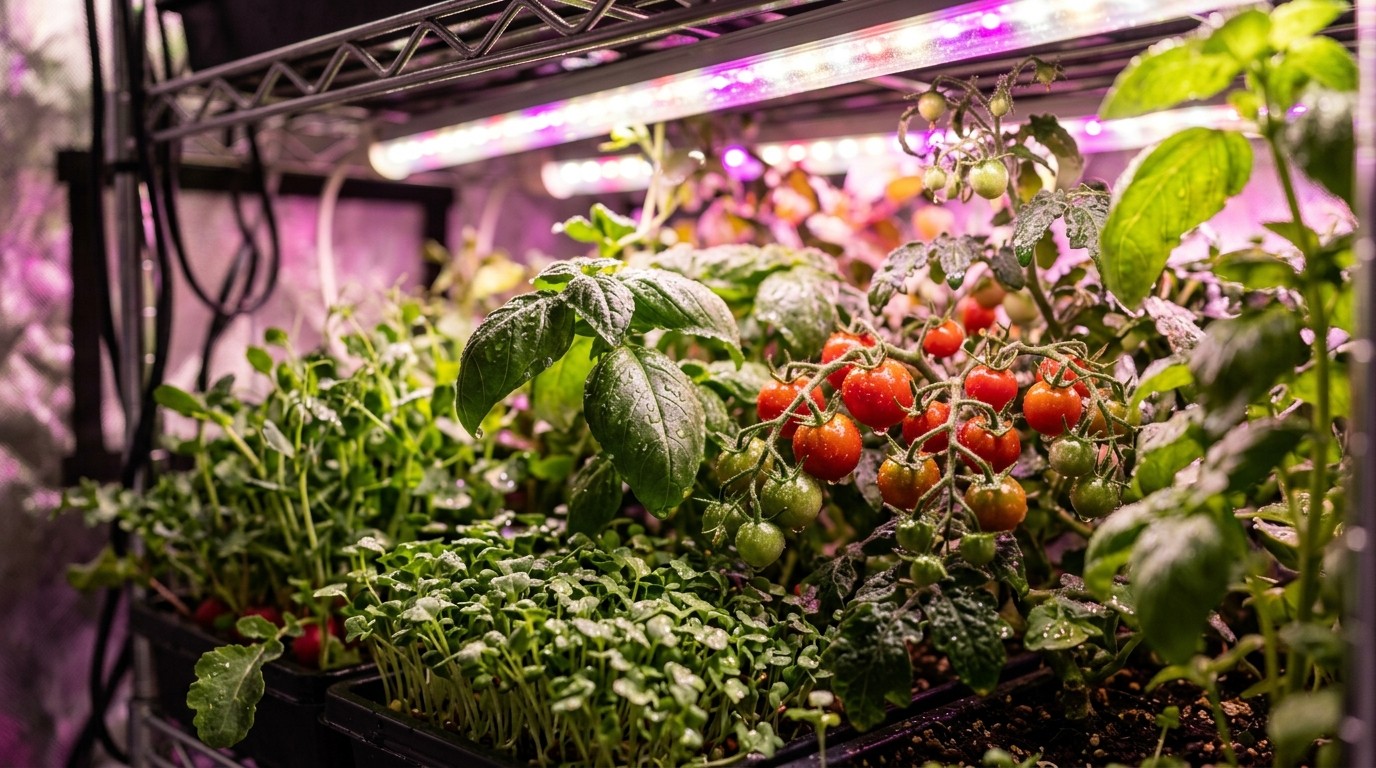
Commercial pre-built grow cabinets and branded indoor hydroponic towers frequently cost upwards of $600 to $1,000 while offering rigid, unalterable shelf configurations. Building your own vertical grow rack allows complete customization over tier height, LED lighting spectrums, automatic watering trays, and ventilation controls. Whether installed in a basement corner, utility closet, or garage, this modular setup provides the ideal controlled ecosystem for winter food security and early spring seed starting.
Why You’ll Love This DIY Grow Rack Setup
- Substantial Budget Savings: Build a high-capacity 4-tier growing station for under $130 using accessible hardware store components.
- Ultra-High Vertical Yields: Triples your growing footprint by utilizing vertical headroom, holding up to 8 standard 1020 seedling or microgreen flats.
- Complete Micro-Climate Control: Clear zippered greenhouse covers trap natural ambient humidity while circulating fans eliminate mold and damping-off.
- Dual-Purpose Seasonal Versatility: Operates as an active winter salad factory from October to February, then seamlessly pivots to a high-capacity spring seed starting nursery in March.
Required Materials & Hardware Checklist
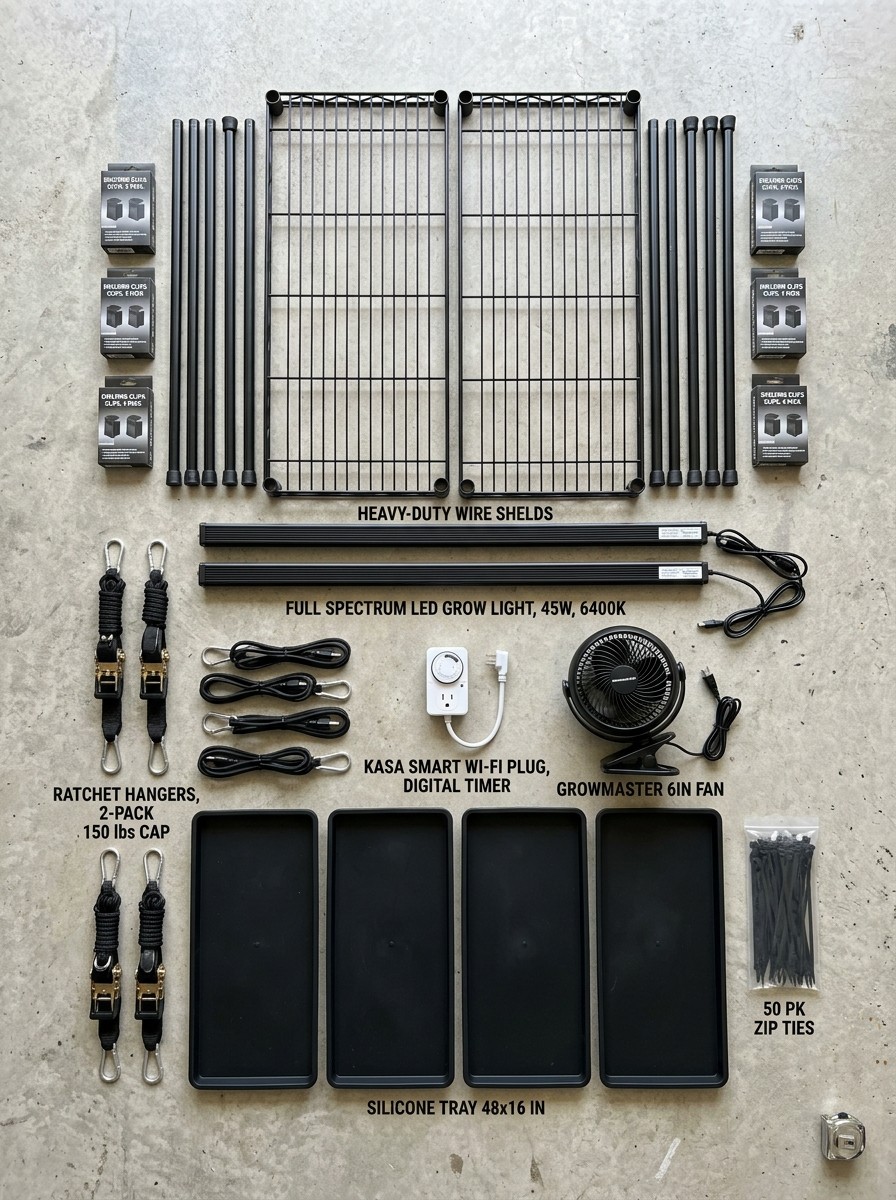
- 4-Tier NSF Chrome Steel Wire Shelf (48″W x 18″D x 72″H): Provides industrial weight capacity (300+ lbs per shelf) and open wire grids for optimal air circulation and light hanging.
- Full-Spectrum LED Grow Light Bars (4-Foot, 5000K–6500K): Energy-efficient, daisy-chainable LED strips delivering 45W per tier of photosynthetically active radiation (PAR) with minimal heat output.
- Clear Fitted PVC Greenhouse Cover or Mylar Tent: Custom-fitted zippered cover traps relative humidity (50%–70%) and protects living spaces from soil debris.
- Smart Wi-Fi Plug or Mechanical 24-Hour Timer: Automates consistent 14 to 16-hour daily photoperiods without requiring manual intervention.
- Heavy-Duty Cable Zip Ties & S-Hooks: Inexpensive, durable fasteners for securing light fixtures and tidying electrical power cords.
Step-by-Step Construction & Wiring Walkthrough
1. Assemble the Wire Shelving Frame: Build the steel wire rack framework following the manufacturer’s corner slip-sleeve instructions. Space your four shelves evenly—allocating roughly 16 to 18 inches of vertical clearance between tiers. This provides ample space for 1020 seed trays, 4-inch nursery pots, and 6 to 8 inches of light fixture clearance above maturing plant canopies.
2. Mount and Daisy-Chain the LED Fixtures: Fasten two 4-foot LED light bars underneath each wire shelf using heavy-duty cable ties or adjustable ratchet rope hangers. Space the two light fixtures roughly 8 inches apart across the shelf width to ensure uniform light distribution across all trays. Connect the light fixtures sequentially using included daisy-chain link cords, routing the master power cord down the rear structural pole.
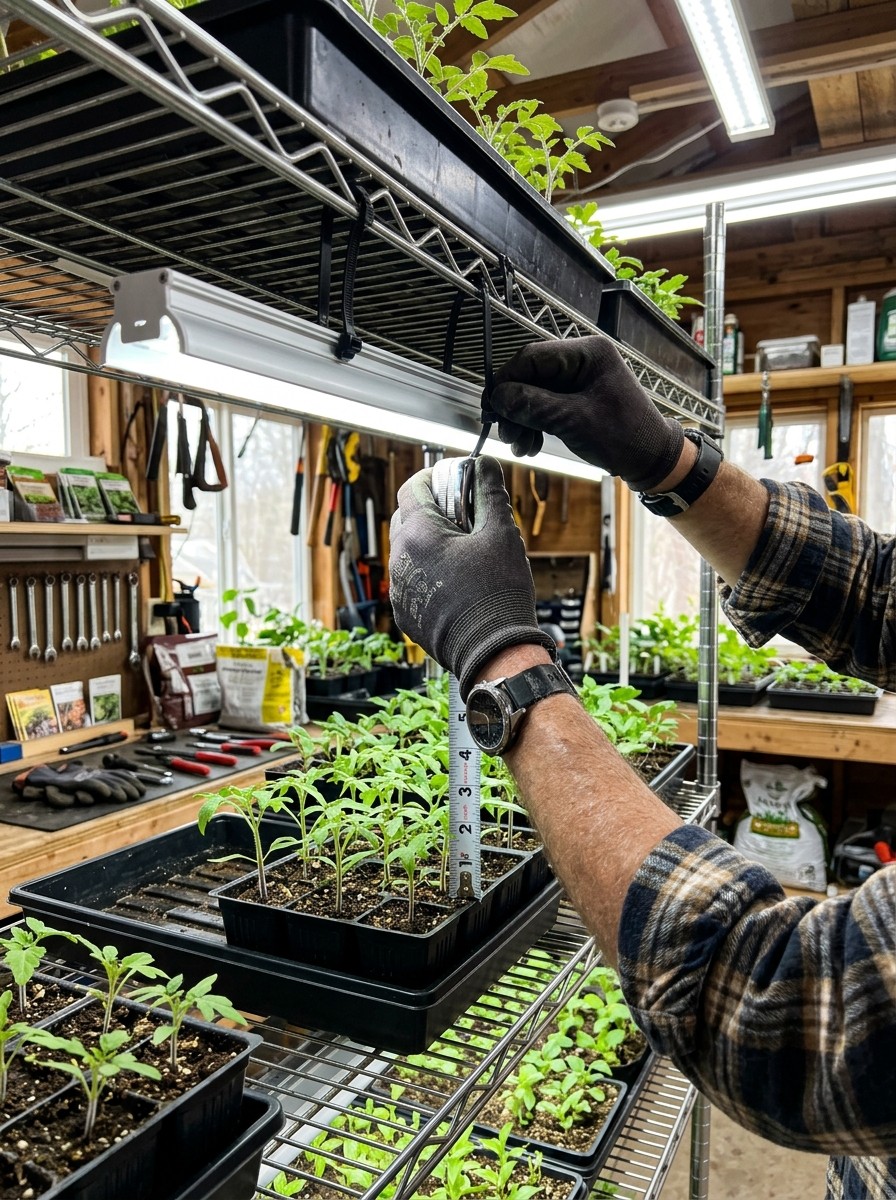
3. Install Waterproof Spill Protection: Place heavy-duty silicone boot trays or standard watertight 1020 drip flats onto each wire shelf. This catches run-off water during bottom-watering cycles, protecting lower LED light fixtures and electrical wiring from accidental water damage.
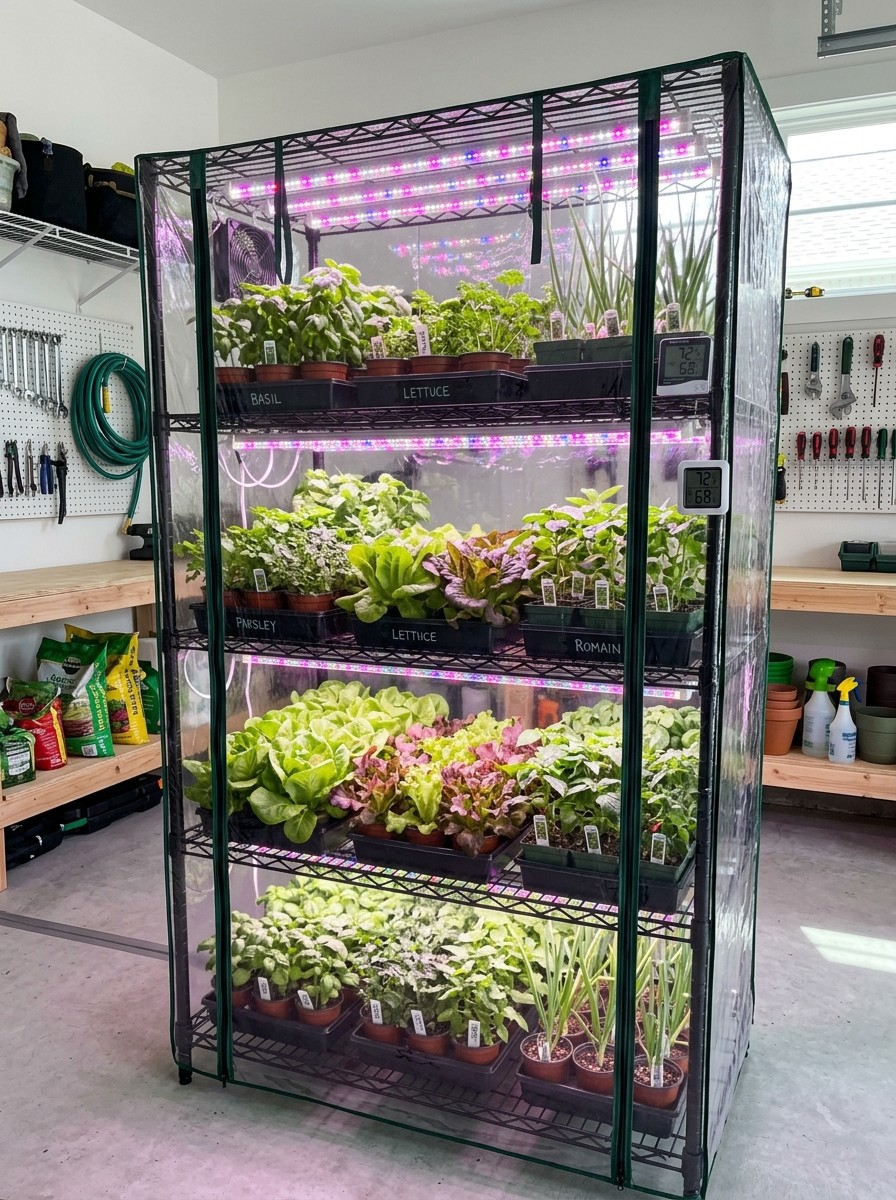
4. Fit the Greenhouse Enclosure & Ventilation: Slip the zippered clear PVC greenhouse cover over the completed shelving frame. Clip a small 6-inch oscillating or USB clip fan onto the upper side frame to generate continuous gentle air movement. Unzip the front roll-up panel 2 to 3 inches during active light hours to regulate humidity and prevent heat accumulation.
3 Master Electric & Horticultural Secrets
1. Maintain the 4-to-6 Inch Light Distance Rule: Unlike old high-pressure sodium (HPS) bulbs, modern LED shop lights emit negligible radiant heat. Keep light bars positioned just 4 to 6 inches directly above seedling canopies. Allowing fixtures to sit 12+ inches above plants forces young stems to stretch, resulting in weak, spindly, leggy growth.
2. The 15-Minute Air Circulation Pulse: Constant stagnant moisture inside closed plastic greenhouse covers creates the perfect breeding ground for Botrytis gray mold and fungal damping-off. Running a low-wattage clip fan builds sturdy stem cell walls (thigmomorphogenesis) while keeping leaf surfaces dry.
3. Group Crops by Growth Cycles: Dedicate the top tier (warmest zone) to heat-loving crops like dwarf cherry tomatoes or pepper bonchi; allocate middle tiers to fast-rotation microgreens and lettuces; and reserve bottom tiers for cool-tolerant root crops or germinating seed flats on heating mats.
Indoor Growing Synergy & Complementary Projects
- Overwintered Pepper Bonchi: Position your pruned winter chilis on your grow rack following our overwintering pepper bonchi bonsai guide.
- Emergency Seed Station Lighting: Compare your setup with our budget-friendly DIY seed starting station with LED shop lights.
- Indoor Small-Space Design: Expand your home edible setup with more creative concepts from our top indoor garden ideas for small spaces.
Troubleshooting Indoor Grow Rack Issues
- Heavy Condensation on Cover Windows: Indicates excess relative humidity (>80%). Open top corner zippers and increase internal fan circulation.
- Pale or Yellowing Seedling Leaves: Often caused by nutrient deficiency in soilless seed starter mixes once true leaves appear. Apply half-strength organic liquid kelp or fish emulsion weekly.
- White Crust on Soil Surfaces: Mineral salt accumulation from tap water and rapid evaporation. Bottom-water trays and flush soil with filtered or rainwater occasionally.
Frequently Asked Questions
How much electricity does a 4-tier LED grow rack consume per month?
Running eight 20W LED bars (totaling 160 watts) for 14 hours per day consumes approximately 2.24 kWh per day. At the average US residential electric rate of $0.16 per kWh, the entire multi-tier system costs approximately $10.50 to $11.00 per month in electricity.
Can I use standard hardware store LED shop lights instead of grow lights?
Yes! Standard 4-foot LED shop lights with a color temperature rating of 5000K to 6500K (Daylight spectrum) and a minimum output of 3,000 to 5,000 lumens per fixture provide sufficient blue-spectrum photon energy for healthy vegetative growth, microgreens, and seedlings.
Do I need to leave the lights on 24 hours a day for faster growth?
No. Plants require a dark period (respiration phase) to metabolize carbohydrates produced during photosynthesis and support healthy root development. A daily photoperiod of 14 to 16 hours of light followed by 8 to 10 hours of uninterrupted darkness yields optimal growth rates without stressing plants.
Pin This DIY Greenhouse Blueprint for Later
Love this DIY greenhouse rack plan? Save this pin to your Indoor Gardening and DIY Garden Projects board on Pinterest so you have these wiring and rack assembly blueprints ready whenever you need them!