Have you ever noticed how the hum of bees and the flutter of butterflies can bring life to your garden? Creating a pollinator garden not only enhances your outdoor space but also plays a vital role in supporting local ecosystems. By cultivating a sanctuary filled with native plants that attract these beautiful creatures, you can contribute to biodiversity while enjoying a vibrant, colorful garden.
If you’re ready to take the plunge into the world of pollinator gardening, you’re in for a rewarding journey. This guide will walk you through each step, helping you choose the right plants, understand their needs, and create an inviting environment for these essential pollinators. Whether you’re a seasoned gardener or just starting out, you’ll find practical tips that make the process enjoyable and fulfilling.
Table of Contents
- What is a Pollinator Garden?
- How Does It Work?
- Benefits of Pollinator Gardens
- Steps to Create Your Pollinator Garden
- Advanced Tips for Enthusiasts
- Tools and Resources
- Frequently Asked Questions
- Conclusion
What Is It?
A pollinator garden is a specially designed space filled with plants that attract and support pollinators like bees, butterflies, and hummingbirds. These gardens are typically rich in native flora, which not only provides food and habitat for these vital creatures but also encourages biodiversity. By focusing on local plant species, you can create a thriving ecosystem that enhances your garden’s beauty while contributing to environmental health.
Pollinator gardens can vary in size and design, from small balcony pots to expansive backyard landscapes. They are often characterized by vibrant colors, diverse plant types, and a variety of bloom times to ensure that there is always something in flower throughout the growing season. This not only benefits pollinators but also provides you with a continuously changing visual feast.
- Pollinator gardens support essential species like bees and butterflies.
- Native plants are crucial for attracting local pollinators.
- These gardens can vary in size and design to suit any space.
How It Works
Pollinator gardens function by providing essential resources for pollinators, including food in the form of nectar and pollen, as well as habitat for nesting and shelter. Native plants are particularly effective because they have evolved alongside local pollinator species, offering the right resources at the right times. The variety of flower shapes, sizes, and colors in these gardens attracts a diverse range of pollinators, enhancing the chances of successful pollination.
Additionally, a well-planned pollinator garden ensures that there are blooms throughout the seasons, supporting pollinator populations year-round. By incorporating plants that flower at different times, you create a continuous food source, which is critical for sustaining local populations of bees and butterflies.
- Native plants provide specific resources that local pollinators need.
- Diverse flower shapes attract various pollinator species.
- Continuous blooms support pollinators throughout the year.
Key Benefits
- Supports Biodiversity — By creating a pollinator garden, you contribute to the health of local ecosystems. These gardens attract a variety of species, promoting biodiversity and helping to maintain balanced ecosystems. A diverse garden can also lead to better crop yields if you grow fruits and vegetables.
- Enhances Aesthetic Appeal — Pollinator gardens are visually stunning, with a vibrant array of colors and textures. They can transform an ordinary yard into a picturesque landscape, offering beauty and serenity that you can enjoy throughout the seasons.
- Educational Opportunities — Creating a pollinator garden is an excellent opportunity to learn about native species, ecology, and gardening practices. It can serve as a living classroom for children and adults alike, fostering a deeper appreciation for nature.
- Promotes Healthy Pollinator Populations — By providing essential resources, you actively support the health and survival of pollinator species. This is increasingly important as many pollinator populations face threats from habitat loss, pesticides, and climate change.
- Provides Fresh Produce — If you include fruit and vegetable plants in your pollinator garden, you’ll not only help pollinators but also enjoy the benefits of fresh, homegrown produce. This can lead to healthier eating habits and a more sustainable lifestyle.
Step-by-Step Guide
Step 1: Choose the Right Location
Selecting the perfect spot for your pollinator garden is crucial. Look for an area that receives plenty of sunlight, ideally at least six hours a day. Pollinators thrive in bright, open spaces where they can easily find food and navigate. Additionally, consider the proximity to water sources and existing plants that may already attract pollinators. Avoid overly windy areas and spots with excessive shade from trees or structures, as these can deter pollinators.
Once you have a location in mind, take a moment to observe the area throughout the day. This will help you understand its light conditions and any other environmental factors that might impact your garden’s success.
Example: A sunny patch in your backyard with minimal shade would be ideal for a pollinator garden.
Pro Tips:
- Choose a location near existing flowers to attract more pollinators.
- Avoid areas with heavy foot traffic to minimize disturbances.
- Consider windbreaks if your site is exposed to strong winds.
Step 2: Test Your Soil

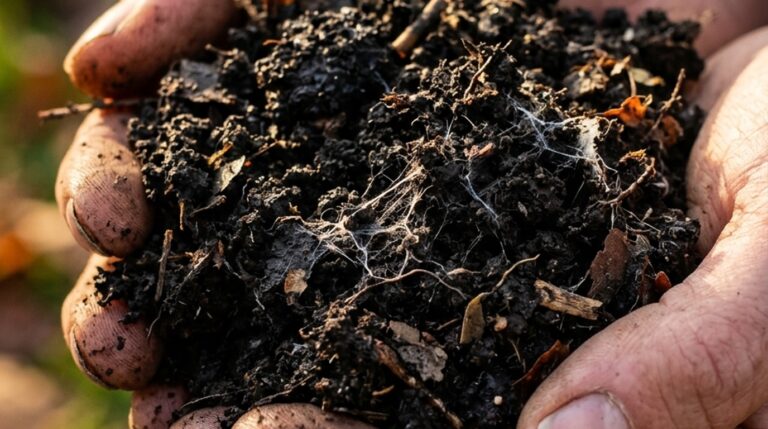
Healthy soil is the foundation of a thriving pollinator garden. Before planting, it’s important to assess your soil’s condition. You can conduct a simple soil test using a kit from a local garden center or online. This will help you determine the pH levels and nutrient content of your soil, guiding you on whether you need to amend it. Pollinators prefer well-draining, nutrient-rich soil, so consider adding organic matter like compost to improve soil structure and fertility.
Once you have your soil test results, you can make informed decisions about any necessary amendments. This might include adding lime to raise pH or sulfur to lower it, depending on what your plants will need to thrive.
Example: Using a soil test kit to check pH and nutrient levels in your garden bed.
Pro Tips:
- Test your soil in multiple spots for a comprehensive overview.
- Amendments should be added well before planting, ideally weeks in advance.
- Consider adding a mulch layer to help retain soil moisture.
Step 3: Select Native Plants

Choosing the right plants is one of the most enjoyable parts of creating your pollinator garden. Focus on native species, as they are well adapted to your local climate and soil conditions. They also provide the best resources for local pollinators. Research the best native plants for your region, considering various bloom times to ensure a continuous supply of food for pollinators. Aim for a mix of flowers, shrubs, and grasses to create a diverse habitat.
Some excellent native plants to consider include milkweed for monarchs, coneflowers for bees, and asters for late-season pollinators. Visit local nurseries or native plant sales to find healthy, locally sourced plants that will thrive in your garden.
Example: A selection of native plants such as coneflowers, black-eyed Susans, and milkweed ready for planting.
Pro Tips:
- Choose plants with varying heights to create visual interest.
- Group plants in clusters for a more natural look and to attract more pollinators.
- Consider plants that bloom at different times to ensure a year-round supply of food.
Step 4: Plan Your Layout

Once you have your plants selected, it’s time to plan the layout of your garden. Consider factors such as plant height, sunlight needs, and bloom times when arranging your plants. Taller plants should be placed at the back or center of your garden beds, while shorter plants can be positioned in the front to ensure they receive adequate sunlight.
You can create a natural look by grouping plants in clusters rather than planting them in straight lines. This not only mimics natural ecosystems but also attracts more pollinators. Consider leaving some open spaces for pollinators to land and rest, and include paths or stepping stones for easy access to your garden.
Example: Arranging taller plants like sunflowers at the back of the garden bed with shorter flowers like daisies in front.
Pro Tips:
- Sketch your layout on paper before planting to visualize the arrangement.
- Leave ample space between plants for air circulation and growth.
- Incorporate pathways for easy maintenance and to enjoy the garden.
Step 5: Prepare the Soil

With your layout in mind, it’s time to prepare your soil for planting. Start by clearing the area of weeds, rocks, and debris, ensuring a clean slate for your new plants. Use a garden fork or tiller to loosen the soil to a depth of about 12 inches. This aeration allows roots to penetrate easily and promotes healthy growth. If your soil test indicated any nutrient deficiencies, incorporate organic matter like compost or well-rotted manure at this stage to enrich the soil.
After mixing in your amendments, rake the soil to create an even surface. This preparation step is vital for establishing a thriving pollinator garden that will flourish for seasons to come.
Example: Using a garden fork to loosen and aerate the soil in your garden bed.
Pro Tips:
- Work the soil when it’s dry to avoid compacting it.
- Consider using a soil amendment like compost tea during planting.
- Keep the soil moist after planting to encourage root establishment.
Step 6: Plant Your Flowers

Now comes the exciting part: planting your native flowers! Following your planned layout, dig holes that are about twice the size of the root ball of each plant. Place the plants into their respective holes, ensuring that they are planted at the same depth as they were in their containers. Fill in around the roots with soil, gently packing it down to eliminate air pockets, and water each plant thoroughly to help them settle in.
Make sure to give your new plants some space to grow, and avoid crowding them. This will allow for better air circulation and access to sunlight, both of which are crucial for their health and the attraction of pollinators.
Example: Planting coneflowers at the designated spots within the garden layout.
Pro Tips:
- Water the plants immediately after planting to help with shock.
- Check for any old weeds or roots that might compete with your new plants.
- Consider planting in the evening or on a cloudy day to reduce stress on the plants.
Step 7: Water Wisely

After planting, it’s essential to establish a proper watering routine to help your new pollinator garden thrive. Newly planted flowers will need consistent moisture, especially during their first few weeks as they establish roots. Water deeply but infrequently, allowing the soil to dry slightly between watering sessions. This encourages deep root growth and helps the plants become more drought-resistant over time.
Consider using a soaker hose or drip irrigation system for efficient watering, as this targets the roots directly and reduces evaporation. Always be mindful of your local weather conditions and adjust your watering schedule accordingly, especially during dry spells.
Example: Setting up a soaker hose to water the newly planted flowers efficiently.
Pro Tips:
- Water early in the morning to reduce evaporation.
- Check the soil moisture by sticking your finger into the dirt; if it feels dry, it’s time to water.
- Mulch around the plants to retain moisture and suppress weeds.
Step 8: Maintain Your Garden

Maintaining your pollinator garden is key to ensuring its long-term health and vitality. Regularly check for weeds, pests, and diseases that could threaten your plants. Weeding should be done by hand or with a hoe to avoid disturbing the roots of your flowers. Additionally, deadheading spent blooms will encourage more flowers to develop and keep your garden looking tidy.
You should also apply a layer of mulch to help retain moisture and suppress weed growth. As the seasons change, consider adding seasonal blooms to keep the garden vibrant and appealing to pollinators, ensuring there is always something for them to enjoy.
Example: Regularly deadheading spent flowers to encourage new growth in the garden.
Pro Tips:
- Use organic pest control methods to protect beneficial insects.
- Keep a garden journal to track plant growth and pollinator visits.
- Rotate plants periodically to prevent soil depletion.
Advanced Tips
Incorporate Water Features
A small water feature, like a birdbath, serves as a refreshing oasis for pollinators.
Create Shelter Areas
Creating sheltered areas will help protect pollinators and encourage them to visit your garden.
Embrace Seasonal Changes
Planting for seasonal changes ensures a continuous food source for pollinators.
Utilize Companion Planting
Using companion planting can improve plant health and pollinator attraction.
Tools & Resources
- Soil Test Kit — A soil test kit allows you to assess pH and nutrient levels in your garden soil. Knowing the composition of your soil helps you make informed decisions about amendments needed for optimal plant growth. — Available at: Home Depot, Amazon
- Native Plant Guide — A native plant guide provides information on local species that are best suited for your area. These resources can help you select the right plants to attract specific pollinators. — Available at: Local libraries, native plant societies, Amazon
- Gardening Tools Set — A basic gardening tools set typically includes essential items such as trowels, cultivators, and pruners. Having the right tools makes planting and maintaining your garden much easier. — Available at: Home Depot, Lowe’s, Amazon
- Compost Bin — A compost bin allows you to recycle organic waste into nutrient-rich compost. This natural fertilizer enhances soil quality and supports healthy plant growth in your pollinator garden. — Available at: Home Depot, local gardening stores, Amazon
- Drip Irrigation System — A drip irrigation system delivers water directly to the roots of your plants, reducing waste and promoting healthy growth. This efficient watering method is particularly beneficial for new plantings. — Available at: Home Depot, Lowe’s, Amazon
Frequently Asked Questions
What plants are best for a pollinator garden?
The best plants for a pollinator garden are native flowering species that provide nectar and pollen. Some popular choices include milkweed, coneflowers, asters, and black-eyed Susans. These plants attract a variety of pollinators, including bees, butterflies, and hummingbirds.
When selecting plants, consider the specific pollinators you wish to attract and choose a mix of flowers that bloom at different times throughout the growing season.
How can I attract more butterflies to my garden?
To attract more butterflies, ensure your garden includes host plants where they can lay eggs, such as milkweed for monarchs. Additionally, plant a variety of colorful flowers that provide nectar. Sunflowers, zinnias, and lantanas are excellent options.
Creating sheltered areas and providing water sources can also help make your garden a more inviting habitat for butterflies.
Do I need to use pesticides in my pollinator garden?
It’s best to avoid using pesticides in your pollinator garden as they can harm beneficial insects. Instead, focus on organic pest control methods, such as introducing beneficial insects, using insecticidal soap, or applying neem oil. Encouraging a balanced ecosystem will help keep pests at bay naturally.
Regularly monitoring plants for signs of pests and diseases can also help you catch issues early and address them without chemicals.
How often should I water my pollinator garden?
Watering frequency will depend on your climate, soil type, and plant needs. Newly planted flowers typically require consistent moisture, so water them deeply once or twice a week. As your plants establish roots, you can reduce watering to once a week or as needed.
Always check the soil moisture before watering; if the top inch feels dry, it’s time to water. During hot, dry spells, you may need to water more frequently.
Can I have a pollinator garden in a small space?
Absolutely! Pollinator gardens can be adapted to fit any space, from small balconies to tiny backyards. Use containers or vertical gardening techniques to maximize your area. Choose compact native plants that thrive in smaller spaces and arrange them to create a vibrant display that attracts pollinators. Even a few pots of native flowers can make a big difference.
Creating a pollinator garden is not just a rewarding gardening project; it’s a meaningful way to support our vital pollinator populations. By following the steps outlined in this guide, you can cultivate a beautiful space that attracts bees, butterflies, and other pollinators, enhancing your garden’s beauty and ecological health.
As you embark on this journey, take pride in each bloom and every fluttering visitor. Your efforts contribute to a thriving ecosystem and will provide enjoyment for years to come. So grab your gardening tools and get started on creating your very own pollinator paradise today!