Propagating a majestic Monstera Deliciosa is one of the most satisfying milestones for any indoor plant enthusiast. Whether your mother plant has grown unruly and leggy, or you simply want to multiply your lush jungle canopy to share with friends, taking stem cuttings allows you to create vigorous new specimen plants with identical genetic vigor. By mastering the anatomical difference between petioles and true growth nodes, and following a sterile water propagation protocol, you can achieve a 100% rooting success rate with zero risk of stem rot.
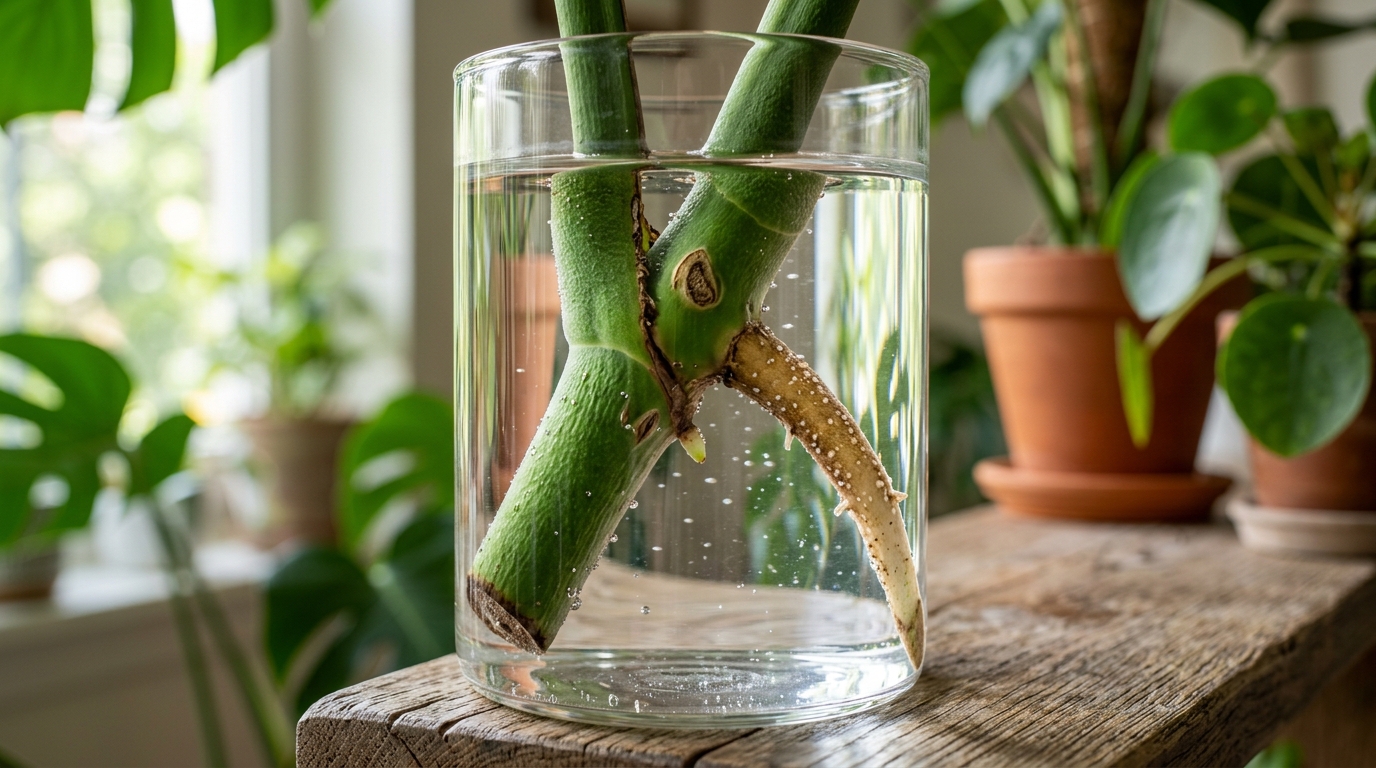
The single most common propagation mistake is attempting to root a solitary leaf severed at the petiole. While a severed leaf stem may survive in water for months, it lacks the undifferentiated meristematic cells required to generate new foliage buds or true root systems. To successfully propagate Monstera, every cutting must include at least one prominent growth node—the distinct circular ring on the main vine where aerial roots, leaf petioles, and dormant axillary buds converge.
Why Water Propagation is the Gold Standard for Monstera
- 100% Visual Monitoring: Transparent glass vessels allow you to inspect root elongation and detect early signs of bacterial cloudiness instantly.
- Faster Root Initiation: Direct contact with well-oxygenated water triggers root emergence within 14 to 21 days.
- Zero Soil-Borne Pathogens: Eliminates initial exposure to soil gnats, damping-off fungi, and heavy anaerobic potting mixes.
- Effortless Hydration: Unrooted cuttings maintain full leaf turgor without requiring enclosed high-humidity propagation tents.
Essential Tools, Propagation Supplies & Sterilization

- Bypass Pruning Shears or Floral Knife: Sharp blades ensure clean vascular cuts without crushing delicate stem tissues. Sterilize with 70% isopropyl alcohol before every cut.
- Glass Propagation Cylinders or Flasks: Clear glass permits maximum ambient light to reach the node while displaying beautiful aquatic root growth.
- Ground Ceylon Cinnamon or Sulfur Powder: A natural organic antifungal dust applied to mother plant wounds to prevent bacterial dieback.
- Filtered or Dechlorinated Water: Tap water left standing for 24 hours prevents chlorine sensitivity in sensitive young root meristems.
Step-by-Step Node Cutting Walkthrough
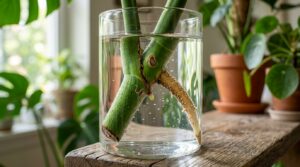
1. Step 1: Identify the Growth Node & Aerial Root: Inspect the mother vine to locate a healthy node with 1 to 2 mature fenestrated leaves and an emerging brown aerial root stub.
2. Step 2: Make the Surgical 45-Degree Cut: Position your sterilized shears precisely 1/2 to 1 inch below the node. Slice cleanly at a 45-degree angle to maximize water-absorbing surface area.

3. Step 3: Let the Cut Callus for 30 Minutes: Allow the fresh cut to air-dry and form a thin protective callus. Dust the mother plant’s cut end with organic cinnamon powder.
4. Step 4: Submerge Node in Clean Water: Place the cutting in your glass vessel, submerging the node and aerial root while keeping all leaf blades and upper petioles completely dry.
5. Step 5: Position in Bright Indirect Light: Place the rooting station near an east- or north-facing window (68°F–78°F / 20°C–25°C). Refresh water every 5 to 7 days to replenish dissolved oxygen.
3 Master Botanist Secrets for Rapid Rooting
1. The Pothos Companion Rooting Hack: Place a small golden pothos cutting in the same water jar. Pothos naturally exudes concentrated plant auxins (rooting hormones) that accelerate Monstera root branching by up to 40%.
2. Never Submerge Leaf Petiole Junctions: Only submerge the lower node and root. Submerging the base of the leaf petiole invites soft rot that can travel up into the foliage.
3. The “Secondary Root” Potting Rule: Wait until the primary roots develop secondary lateral root branches (fuzzy white side roots) at least 3 to 4 inches long before transitioning to chunky potting mix.
Transitioning Water Roots to Chunky Aroid Soil

- The Aroid Soil Mix Formula: Combine 40% high-grade potting soil, 30% chunky orchid bark, 20% coarse perlite, and 10% worm castings or our Organic Soil Conditioners.
- Pot Size Selection: Choose a compact 6-inch nursery or terracotta pot with ample bottom drainage holes. Oversized pots hold excess stagnant moisture.
- Initial Acclimatization Moisture: Keep soil evenly moist (not waterlogged) for the first 14 days to help fragile aquatic roots adapt to soil friction and nutrients.
Frequently Asked Questions
Can I propagate a Monstera leaf without a node?
No. A leaf without a node (called a ‘zombie leaf’) will stay green in water for months but lacks the necessary tissue to grow new stems or root systems.
How long does Monstera take to root in water?
In warm conditions (70°F–75°F) with bright indirect light, root nubs appear within 2 weeks, and full transplant-ready root systems develop in 4 to 6 weeks.
Should I add fertilizer to propagation water?
No. Fragile aquatic roots can be chemically burned by synthetic fertilizers. Only resume gentle organic feeding once the plant is potted in soil for 4 weeks.
Love This Guide? Pin It!
Save this step-by-step Monstera propagation guide to your Pinterest houseplant board so you never lose the exact node cutting technique!

Pin This Gardening Guide for Later
Save this Monstera propagation masterclass to your Houseplant Care or Indoor Jungle DIY Pinterest board to turn one plant into a whole forest!