
Throughout late spring and early summer, few perennial border inhabitants command admiration quite like Iris sibirica, celebrated globally as the Siberian Iris. With their graceful, beardless blossoms floating like exotic butterflies above dense fountains of slender, upright foliage, they introduce unmatched architectural elegance to moist landscape margins. As the growing season wanes, this verdant fountain transforms into a glowing tapestry of tawny gold and russet bronze. Yet, beneath this picturesque autumnal display lurks an insidious winter peril: the microscopic egg masses of the destructive iris borer moth. Safeguarding your prized clumps for sub-zero freezes requires mastering the precise timing of the late-season cutback, strict garden sanitation, and protective crown mulching.
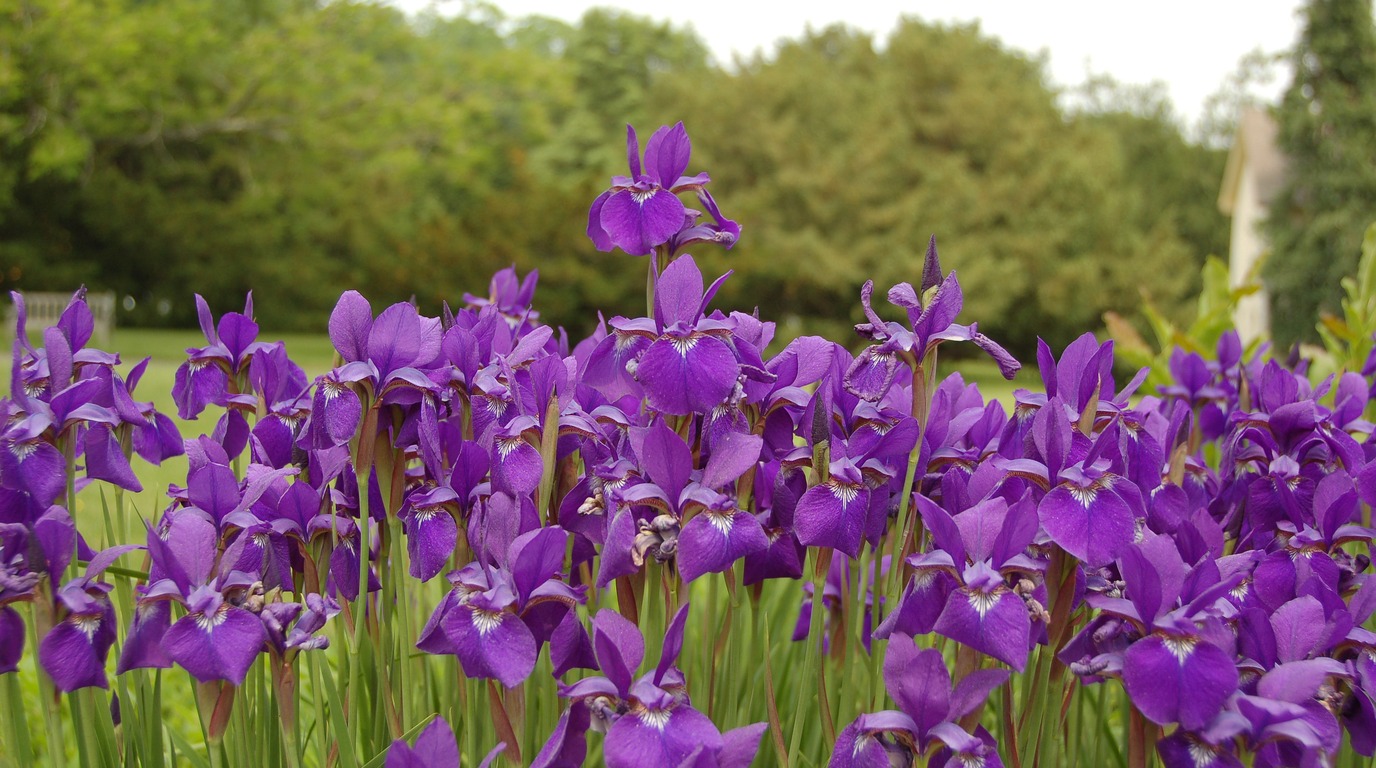
Unlike their German bearded counterparts—which form fleshy, surface-creeping rhizomes that demand sun baking and succumb rapidly to bacterial soft rot—Siberian irises develop dense, fibrous root systems safely nestled one to two inches beneath the soil surface. This subterranean root structure grants them astonishing cold hardiness across USDA Zones 3 through 9, allowing them to endure bitter -40°F (-40°C) polar blasts without blinking. However, allowing the collapsed autumn foliage to mat over the crown creates a damp, oxygen-deprived shelter where fungal spores thrive and borer larvae hatch in spring to drill fatal tunnels into the crown. A structured late-fall regimen eliminates pest cycles while insulating the dormant crown through deep freezes.
Why Siberian Iris Is an Essential Winter-Resilient Perennial
- Exceptional Alpine & Northern Hardiness: Rated down to USDA Zone 3, mature clumps tolerate deep frozen ground and heavy snow loads far better than tender Mediterranean irises.
- Immunity to Bacterial Soft Rot: Because the fibrous crowns and storage roots live protected beneath the soil line, they readily tolerate moist winter beds that rot bearded irises.
- Natural Deer and Rodent Deterrence: Bitter chemical glycosides within the foliage and root systems make Siberian Iris virtually unpalatable to foraging deer, rabbits, and voles seeking sustenance in shade-loving problem areas.
- Four-Season Architectural Texture: From luminous spring blossoms to upright summer reeds and golden-bronze autumn tapestries, Siberian Iris anchors perennial beds throughout the year.
Key Winterizing Supplies & Mulch Smart Swaps

- Sharp High-Carbon Hand Shears or Sickle: Dense Siberian iris foliage is tough and fibrous; dull tools rip the crown from the ground, tearing fragile feeder roots.
- Pine Straw or Shredded Hardwood Mulch: Loose, breathable organic materials provide ideal thermal protection against soil heave without smothering emerging spring fans.
- 70% Isopropyl Alcohol Spray: Disinfecting cutting blades between individual clumps prevents the mechanical transmission of mosaic viruses and fungal leaf spot spores.
- Heavy-Duty Yard Waste Bags: Diseased or borer-prone autumn foliage must be bagged and removed from the property—never add spent iris foliage to home compost piles.
Step-by-Step Autumn Cutback & Winterizing Walkthrough
1. Wait for Hard Killing Frosts: Allow the grassy leaves to remain untouched through late summer and early autumn. Photosynthetic energy continues traveling from the green foliage down into the subterranean crowns until several hard killing frosts turn the blades from green to golden-bronze and finally to a collapsed, pale tan.
2. Cut Foliage Down to 2 to 3 Inches: Once the foliage has browned completely, bundle the upright leaves with one hand and make a clean, horizontal cut 2 to 3 inches above the soil line using sharp shears. Never tear or rip the leaves by hand, as this dislodges shallow fibrous root anchors.

3. Thoroughly Rake and Sanitize the Bed: Rake every fragment of trimmings, dried seed pods, and fallen tree leaves away from the iris clumps. The female iris borer moth lays microscopic eggs directly on dead iris leaves in autumn; disposing of this debris in municipal yard waste breaks the pest lifecycle completely.
4. Apply a 2-Inch Protective Winter Mulch Blanket: Once the top layer of garden soil freezes solid (typically late November to mid-December), apply a 2- to 3-inch layer of clean pine needles, evergreen boughs, or shredded bark over the crowns. Applying mulch after the soil freezes prevents early rodent nesting and ensures soil temperatures remain evenly chilled, avoiding destructive freeze-thaw heaving.
3 Horticulturist Secrets for Flawless Siberian Iris Winter Survival
1. Autumn Cutback Is Non-Negotiable for Iris Borer Control: While some perennials benefit from leaving winter foliage intact for wildlife, Siberian irises must be trimmed back in autumn. Iris borer (Macronoctua onusta) eggs overwinter exclusively on old iris leaf debris. Leaving unpruned foliage in place ensures an explosion of destructive caterpillars the following spring, contrasting with the delayed cutback protocol used when learning how to winterize Caryopteris.
2. Never Plant or Leave Crowns Exposed Above Ground: Gardeners accustomed to bearded irises often make the mistake of planting Siberian irises with exposed rhizomes. Siberian roots must sit comfortably buried under 1 to 2 inches of fertile, moisture-retentive, slightly acidic soil to survive deep winter frosts.
3. Remove Winter Mulch at the First Sign of Green: In early spring as snowpacks recede and ambient temperatures hover near 45°F (7°C), pull winter mulch gently back 2 inches from the crown center. Prompt exposure to early spring sunshine warms the soil and accelerates vigorous, multi-stemmed flower fan emergence.
What to Pair with Siberian Iris in Moist Winter Borders

- Astilbe (False Goat’s Beard): Sharing a deep affinity for consistently moist, humus-rich soils, astilbes form an outstanding textural companion when managed alongside winterizing Astilbe protocols.
- Japanese Anemones (Anemone × hybrida): Providing late-summer floral fireworks as Siberian iris seedpods ripen, anemones transition gracefully into dormant mulch companions under our guide on winterizing Japanese Anemones.
- Ornamental Sedges (Carex) & Hostas: Broad foliage hostas and evergreen moisture-loving sedges provide lush low-profile ground cover that frames upright Siberian iris fans all season long.
Winter Container Care & Spring Clump Dividing
- Overwintering Containerized Specimens: Siberian irises in patio planters require root insulation against sub-freezing air. In USDA Zone 6 or colder, sink the nursery pot into an empty garden bed up to its rim or store the dormant container in an unheated garage, moistening soil every 4 weeks.
- Clump Division Timing: Divide overgrown, doughnut-shaped clumps either in late summer (August) or early spring just as green shoots emerge. Autumn divisions must be planted at least 6 weeks before ground freeze to establish anchor roots against frost heaving.
- Spring Feeding Protocol: As fresh green fans reach 4 inches tall in spring, apply a balanced 10-10-10 slow-release organic fertilizer or top-dress with aged compost to fuel spectacular early summer floral spikes.
Frequently Asked Questions
When is the best time to cut back Siberian irises in the fall?
Cut back Siberian irises in late autumn after several hard frosts have turned the grassy foliage completely brown or bronze. Trimming too early deprives the subterranean crown of valuable photosynthetic energy, while delaying past winter allows borer eggs to survive.
How do I protect Siberian irises from iris borers over winter?
The most effective borer control is meticulous autumn sanitation. Trim the collapsed foliage down to 2 inches above the soil line and dispose of all debris in the municipal trash. Never compost spent iris leaves, as borer moth eggs easily survive cold composting.
Do Siberian irises need mulch for the winter?
Yes, especially in USDA Zones 3 through 6. While mature crowns are cold-hardy, a 2- to 3-inch layer of pine straw or shredded bark applied after the soil freezes solid prevents frost heaving, which pushes shallow root crowns out of the ground during winter thaw cycles.
Pin This Siberian Iris Winterizing Guide for Later
Protect your royal blue blossoms! Save this pin to your Pinterest gardening board so you have these essential autumn cutback and iris borer prevention tips ready whenever frost arrives!
