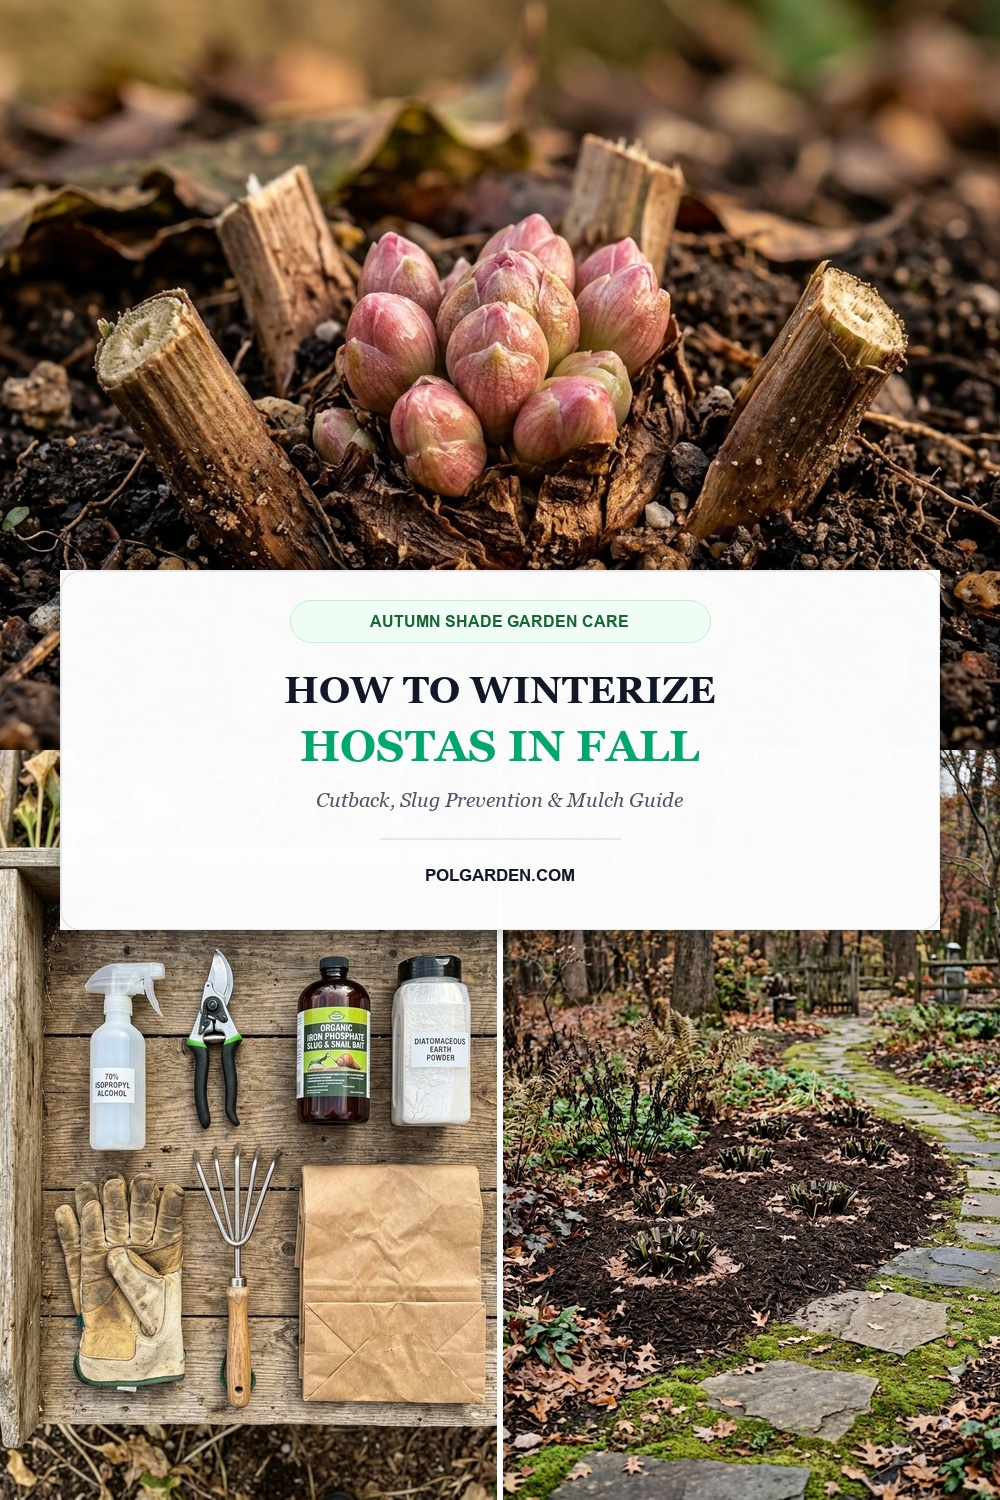
With their sculptural mounding habit, deeply ribbed heart-shaped leaves, and breathtaking spectrum of variegation ranging from cool glaucous blues to luminous chartreuses and cream margins, hostas (Hosta spp.) are the undisputed kings and queens of the shade garden. Beyond their lush architectural presence, hostas are remarkably rugged, cold-hardy herbaceous perennials capable of surviving brutal sub-zero winters across USDA Hardiness Zones 3 through 9 without batting an eye. However, as autumn draws to a close, a critical window opens that dictates the health and beauty of your shade borders for the entire upcoming year: leaving dead, collapsed hosta foliage on the ground through winter transforms your garden beds into an insulated breeding incubator for destructive slug colonies, fungal crown rots, and overwintering foliar nematodes. Fortunately, learning how to winterize hostas in fall is one of the cleanest and most rewarding seasonal garden routines: by waiting for the first hard frost, shearing stems cleanly to two inches, bagging all sodden foliage, and applying proactive biological slug control, you can guarantee immaculate, hole-free hosta foliage from the moment new shoots emerge in spring.
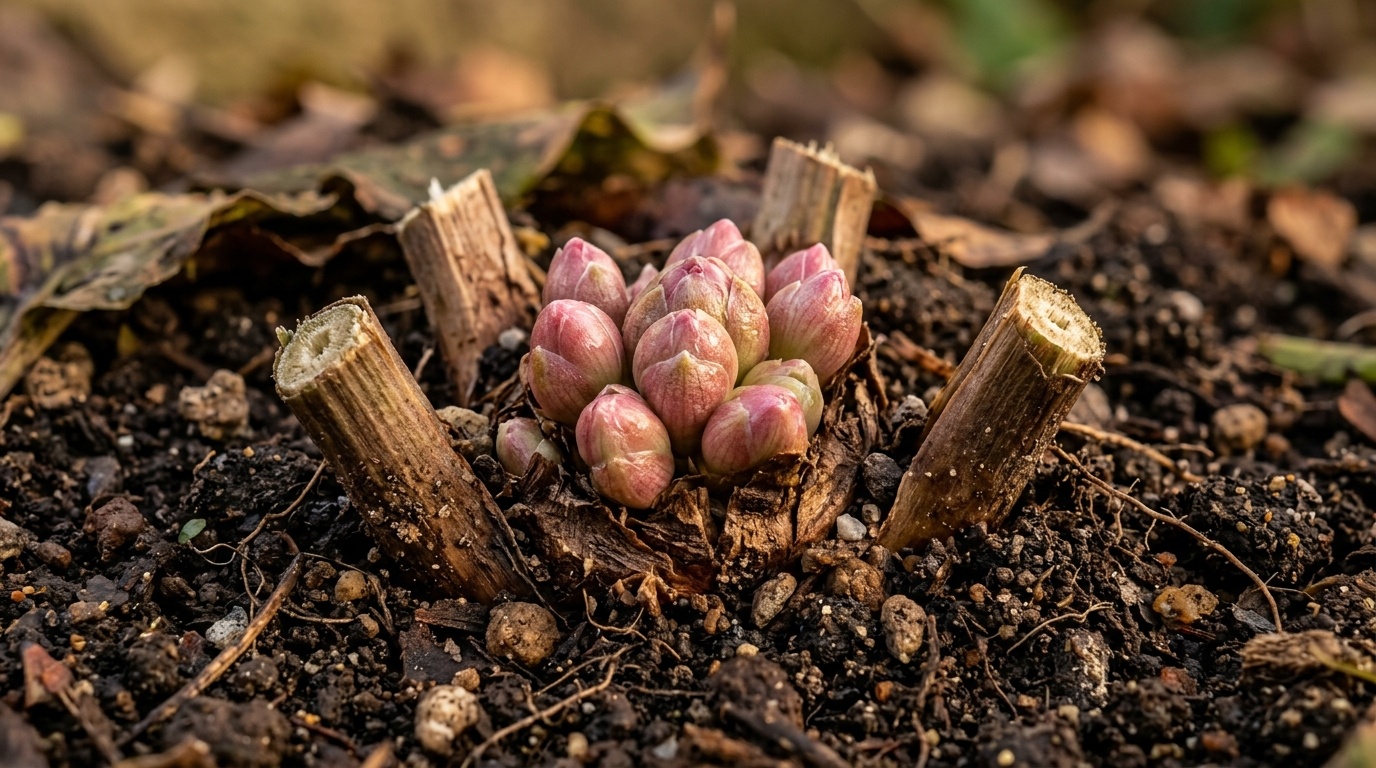
To winterize hostas with complete confidence, gardeners must understand the plant’s natural autumn shutdown sequence. Unlike evergreen shade companions, hostas are true herbaceous perennials that naturally senesce and reabsorb all mobile nutrients from their leaves back down into their dense, fibrous rhizomatous crowns as daylight dwindles. Cutting leaves back too early—while they are still vibrant green in late summer—shortchanges the root system of vital carbohydrates needed to power spring bud expansion. Conversely, allowing frost-mushed leaves to melt into a slimy, sodden layer over the winter creates an impenetrable barrier that traps excessive moisture around the crown, inviting petiole rot (*Sclerotium rolfsii*) and providing thousands of garden slugs (*Deroceras reticulatum*) with the exact dark, damp sanctuary they seek to deposit clusters of translucent overwintering eggs. By applying our four-step seasonal blueprint—frost-triggered timing, hygienic stem cutback, thorough debris removal, and crown-safe mulching—you will protect your prized cultivars, harmonizing with methods used in our guide to cutting back peonies in fall.
Why You’ll Love Winterizing Hostas in Fall
- Eradicates Slug Breeding Colonies at the Source: Over 80% of next season’s garden slugs hatch from eggs laid beneath decaying hosta leaves during late autumn; removing this debris physically breaks the generational pest cycle.
- Prevents Fatal Crown Rot & Sclerotium Fungi: Wet, rotting hosta foliage sitting on saturated winter soil creates an anaerobic environment where fungal spores invade crown tissue, causing mushy stem collapse.
- Eliminates Overwintering Foliar Nematodes: Microscopic leaf nematodes (*Aphelenchoides fragariae*) survive the winter exclusively inside dead, brown hosta leaf tissue; bagging and removing spent leaves clears the pathogen from your soil.
- Protects Emerging Spring “Bullet” Shoots: Dense, slimy winter leaf mats can smother early emerging hosta “bullets” and companion spring bulbs like snowdrops and scillas; clean beds allow tender shoots to rise unimpeded.
Key Supplies & Pre-Winter Prep Station

Set up your shade garden maintenance station on a crisp, dry autumn afternoon:
- Bypass Hand Pruners or Garden Shears: Sharp bypass pruners provide swift, clean cuts across thick petiole bundles without crushing or tearing vascular tissues. Always avoid dull hedge clippers that shred leaves.
- 70% Isopropyl Alcohol Spray Bottle: Essential for sterilizing cutting blades between individual hosta clumps to prevent the transmission of incurable Hosta Virus X (HVX) through infected plant sap.
- Hand Cultivator or Claw Rake: Perfect for gently teasing away collapsed, sticky leaves tucked deep between rhizome crevices without scraping the emerging crown eyes.
- OMRI-Listed Iron Phosphate Slug Bait: Non-toxic to domestic pets, birds, and beneficial ground beetles, iron phosphate pellets applied around cut crowns in autumn eliminate active adult slugs before they lay winter egg clutches, matching our organic methods in proven natural ways to keep slugs out of garden beds.
- Heavy-Duty Paper Yard Waste Bags: Diseased or slimy hosta leaves should always be bagged for municipal green waste disposal or municipal composting where thermophilic temperatures destroy pests and pathogens.
- Shredded Leaf Mold or Pine Bark Mulch: Clean, airy mulch used to protect soil around the perimeter of the root zone, identical to our protocol in how to make DIY leaf mold.
Step-by-Step Walkthrough to Winterize Hostas in Fall
1. Step One: Timing & Waiting for the First Hard Frost: The secret to vigorous spring hostas lies in patient autumn timing. Never cut back green, active hosta leaves in September simply because you want a tidy garden. As long as foliage remains green, the broad leaves are actively transferring sugars and starches down into the underground rhizome crown. Wait until autumn brings the first hard killing frost (nighttime temperatures dropping below 30°F / -1°C). Frost ruptures the plant’s cellular membranes, causing the foliage to instantly turn yellow, bronze, and collapse into a limp, papery drape. This signals that full dormancy has been achieved and cutback can safely proceed.
2. Step Two: Precision Cutback to 1 to 2 Inches: Disinfect your pruner blades thoroughly with 70% rubbing alcohol. Gather a bundle of collapsed, yellowed petioles in one hand, lifting them gently away from the soil. With your shears in the other hand, slice through the stem cluster cleanly roughly 1 to 2 inches (2.5 to 5 cm) above the ground level. Crucial rule: Never rip or yank leaves out of the crown by hand! Tearing stems rips the outer scales off the dormant growth eyes and creates jagged wounds that invite crown rot. Leaving a 1-to-2-inch clean stem collar preserves the dormant crown architecture and marks the plant’s subterranean position so you don’t accidentally step on it during winter.

3. Step Three: Meticulous Ground Sanitation & Slug Egg Disruption: Once all stems are pruned, use your hand claw rake to clear every trace of fallen foliage, dead petioles, and decaying plant matter from the surrounding soil. Inspect the soil right around the crown: slugs frequently lay small, translucent pearl-like clusters of eggs directly beneath the moist leaf base. Lightly scratch the top 1/2 inch of soil around the crown to expose any hidden slug egg clutches to drying air and predatory birds. Discard all collected foliage into paper waste bags—never add sodden hosta leaves to your backyard compost pile if you have a history of slug damage.
4. Step Four: Late-Season Slug Defense & Crown-Safe Mulch: Scatter a light broadcast of organic iron phosphate slug bait around the drip zone of each hosta clump to eradicate any remaining adult slugs preparing to overwinter underground. In USDA Zones 3 through 6, apply a 2-inch layer of clean shredded leaf mold, compost, or aged pine bark across the root zone to insulate against extreme freeze-thaw cycles. Crucial technique: Taper the mulch down as you approach the center of the plant, leaving the central crown eyes exposed or only lightly dusted with mulch. Burying the crown beneath heavy layers of suffocating mulch holds excess winter moisture and triggers rot, a rule also emphasized in our guide on best mulch for autumn garden soil protection.
3 Botanist Secrets for Healthy, Giant Spring Hostas
1. Preventing Hosta Virus X (HVX) Cross-Contamination: Hosta Virus X is an incurable, highly infectious viral disease that causes mottled, blotchy “ink-bleed” tissue discoloration along leaf veins. HVX is transmitted almost exclusively by sap transfer on pruning shears, knives, and spades during autumn cutback or spring division. Always disinfect your pruner blades with rubbing alcohol or a 10% bleach solution between cutting individual hosta varieties. If you encounter a plant exhibiting distorted foliage or sunken tissue veins, isolate it, dispose of it in the trash, and sanitize tools immediately before touching adjacent plants.
2. How to Protect Potted Hostas from Freezing: Hostas grown in containers are more vulnerable to winter kill than those planted in the ground, because container potting mix freezes from all sides, subjecting roots to temperatures 10°F to 15°F colder than surrounding soil. In Zones 6 and colder, do not leave potted hostas exposed on raised decks. After cutting back foliage following the first frost, move potted containers into an unheated garage, garden shed, or cold frame where temperatures hover between 30°F and 40°F (-1°C to 4°C). Alternatively, tip containers on their sides along a north foundation wall to prevent freezing rain from waterlogging the dormant roots.
3. Autumn Dividing for Rapid Multiplication: Early autumn—roughly 4 to 6 weeks before the ground freezes—is actually an outstanding window to divide overgrown hosta clumps. If you have a massive, mature clump that is developing a hollow center, lift the root mass with a garden fork after leaf senescence, slice the crown into 3 or 4 healthy divisions ensuring each section possesses at least 2 to 3 plump eyes and a generous cluster of roots, and replant immediately. Water deeply to settle soil before winter arrives, exactly like our division methods in perennial flower border layering.
Ideal Shade Bed Winter Setup & Soil Care

Proper shade bed maintenance ensures lush, uniform foliage emerge without disease in spring:
- Winter Soil Moisture Monitoring: Ensure that your shade garden beds do not receive direct runoff from roof gutters or downspouts during winter thaws. Standing water pooling over dormant hosta crowns during winter is the leading cause of crown mush.
- Diatomaceous Earth Soil Barrier: In gardens with chronic slug epidemics, dusting the dry soil surface around cut crowns with food-grade diatomaceous earth in late autumn creates a microscopic razor-sharp barrier that damages slug bellies and desiccates crawling pests.
- Companion Perennial Cleanliness: Clean away spent foliage from neighboring shade companions like astilbes, bleeding hearts, and brunneras simultaneously. Leaving adjacent dead foliage intact allows slug populations to simply migrate a few inches away to survive winter.
- Early Spring Mulch Pullback: In early spring as soil temperatures climb past 50°F (10°C), gently sweep away any mulch that washed over the crown center to let early sunlight warm the dormant eyes, stimulating stout, vigorous “bullet” shoots.
Spring Awakening & Slug Defense Protocol
As winter gives way to spring in April and May, the pointed conical shoots—frequently called hosta “bullets”—will push upward through the clean soil:
- First-Shoot Slug Defense Application: The moment you see the very first green conical tips piercing the soil surface, apply a fresh ring of organic iron phosphate bait or coarse crushed eggshells around the perimeter. Slugs love to drill microscopic holes into tightly curled young shoots before they unfurl, which expand into gigantic, unsightly tears as the leaves expand.
- Balanced Spring Feeding: Once foliage unfurls into broad leaves, dress the root zone with a 2-inch layer of rich organic compost or apply a balanced, slow-release granular fertilizer (such as a 10-10-10 organic formula) to fuel giant leaf development.
- Foliar Inspection for Virus X: Inspect fresh spring leaves as they open. Healthy hosta leaves show crisp, uniform color patterns; any plant with translucent blotches or necrotic tissue should be culled immediately.
Frequently Asked Questions
What month should hostas be cut back in fall?
Hostas should be cut back in late October or November, specifically after the first hard killing frost has turned the leaves yellow and limp. Pruning while leaves are still green starves the crown of stored starches needed for spring growth.
What happens if you don’t cut back hostas in fall?
If left standing, dead hosta leaves turn into a slimy, sodden mat over winter that creates the perfect breeding habitat for slugs, slug eggs, and foliar nematodes, while also promoting fungal crown rot that can kill the plant.
How close to the ground should I cut my hostas?
Cut the stems down to roughly 1 to 2 inches (2.5 to 5 cm) above the soil level. Never yank or tear leaves out by hand, as this damages the dormant pink growth buds at the crown and invites rot.
Can I leave hostas in outdoor pots over winter?
Only if you live in warm winter zones (Zone 7 and above). In colder climates (Zones 3 through 6), potted hosta root balls will freeze solid and suffer winter kill. Move containers into an unheated garage, shed, or tip them on their sides against a sheltered wall.
Save This Winter Garden Guide for Later
Love this guide? Save this pin to your Pinterest gardening board so you have the step-by-step hosta winterizing and slug prevention blueprint ready whenever cold weather arrives!